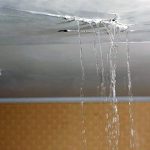
Deteriorating grout
Among one of the most typical factors for shower bases to start dripping is fractured ceramic tile grout and endangered sealants. Grout will normally expand and broaden as the seasons change, and with time, the grout between your porcelain tiles. In other instances, less expensive sealers such as silicon will begin to peel, permitting water to leak below.
As a waterproofing specialist Singapore contractor, we can confirm the finding that grout deterioration is a fairly common occurrence, especially in older households. Thankfully, due to the easy accessibility of grout, repairs can be made swiftly, though not without some hard effort on your part.
Removing deteriorated grout
To seal your dripping shower you don’t necessarily need to replace all of the grout between your tiles, yet you will need to eliminate the old grout. Among one of the most vital tools for this job is a grout saw. These start from just a few dollars for micro saws or for a little less elbow grease, you can swap right up to an oscillating tool.
Clean soap scum and mold and mildew from the whole area, and after that examine the grout between the porcelain tiles. Remove any loosened pieces (with a hammer and slim chisel, grout saw, rotary tool, or even an old flat-head screwdriver), until you get to sturdy grout.
After completely scraping and cleaning out the joints, use a sponge or grout squeege to use the new grout. (Pre-mixed grout, offered in squeeze tubes or in small tubs, will possibly be most convenient to use.) Wipe off any surplus with a damp sponge after it has set.
Apply the new grout
As soon as all of the old grout is eliminated, you will require to permit the area to dry completely before applying new grout. Grouts today are available in lots of colours, and some are likewise flexible, to make sure that there is less chance of the grout cracking. Additionally, choose a grout that has a reduced absorbency rate. As an example, Megagrout MG11 has an absorption rate of 0.0001%, that makes it more waterproof than vitrified or ceramic tiles.
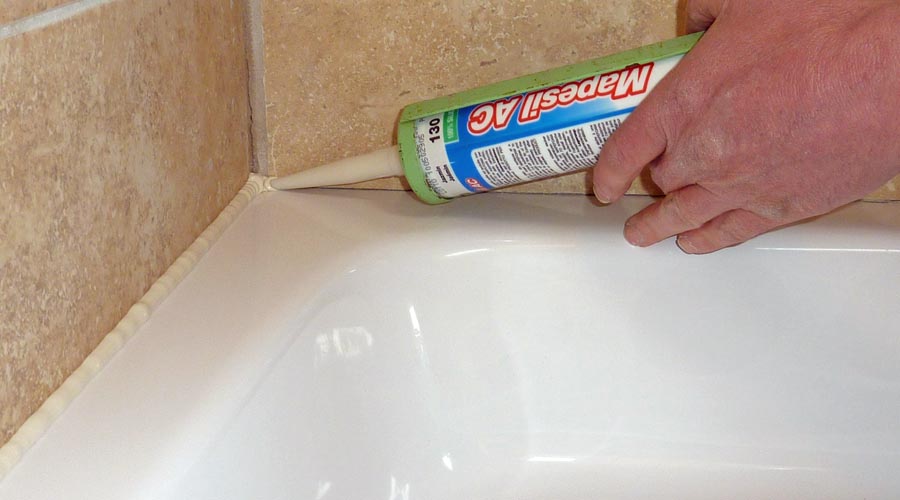
Apply the sealer
When you have regrouted your tiles, you will require to allow them to dry completely prior to applying a sealer to the entire shower system. This will assist to reduce any further leaking and defend against water permeating through any tiny areas you might have missed.
Allow the grout to cure
Allow the new grout and caulk dry totally, usually for 3 days. Then, liberally apply grout sealer (available at ceramic tile stores and a lot of building materials centers) over the whole ceramic tile area, and allow it set for around a sixty minutes. Rub out the excess sealant, and your shower will be primed for usage.